

 English
 Français
 Deutsch
 Nederlands
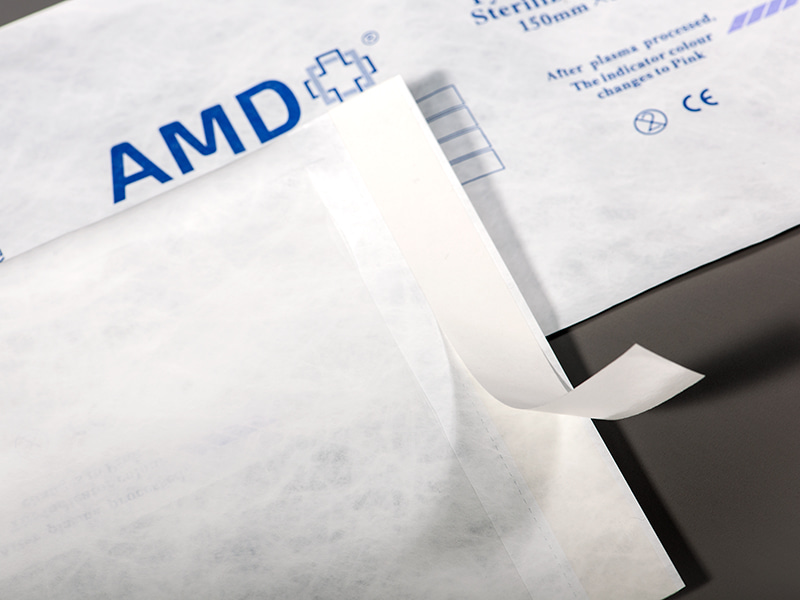
Self Seal Pouches Medical instrument packaging has become an important part of the sterilization workflow. A pouch does more than hold an instrument. It also helps separate processed items from items that have not yet gone through sterilization and provides a barrier during handling and storage.
Self seal pouches are widely used because they can be closed without separate heat-sealing equipment. Many of these pouches also include a chemical indicator. A small printed area on the package may look simple, but it serves a useful purpose. Its visible change gives staff a quick way to identify whether the package has been exposed to the intended sterilization process.

The role of the indicator is often misunderstood. A color change does not mean that an instrument has automatically been proven sterile. Instead, it provides information about exposure to the sterilization process. The Centers for Disease Control and Prevention explains that chemical indicators are designed to respond to physical conditions associated with sterilization and can help identify potential process problems.
Understanding how these indicators work can help medical facilities use self seal pouches more appropriately and interpret their markings with greater care.
Content
- 1 What Is a Chemical Indicator in a Self Seal Pouch?
- 2 How Does the Color Change Happen?
- 3 Why Are Chemical Indicators Added to Self Seal Pouches?
- 4 What Is the Difference Between External and Internal Indicators?
- 5 How Does a Chemical Indicator Show a Possible Problem?
- 6 Can a Color Change Prove That an Instrument Is Sterile?
- 7 How Should Staff Read Chemical Indicators on Self Seal Pouches?
- 8 What Should Facilities Consider When Using Self Seal Pouches With Chemical Indicators?
What Is a Chemical Indicator in a Self Seal Pouch?
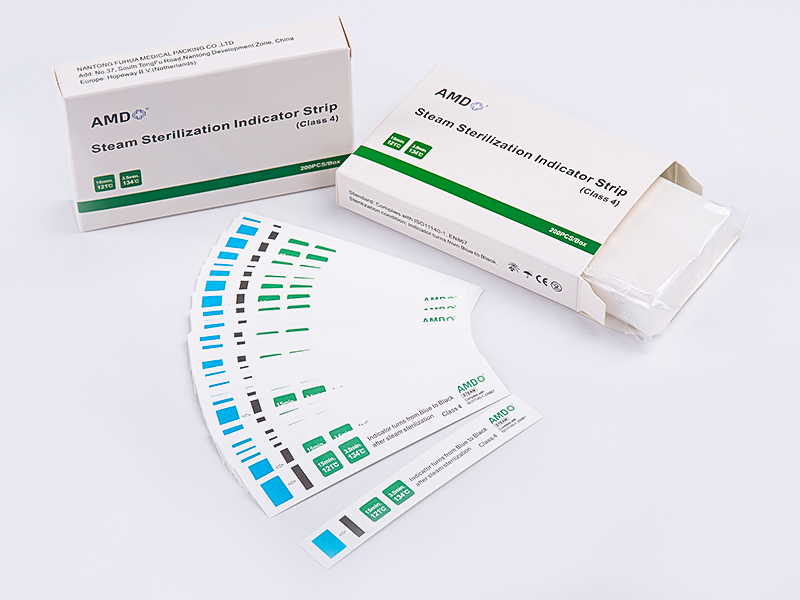
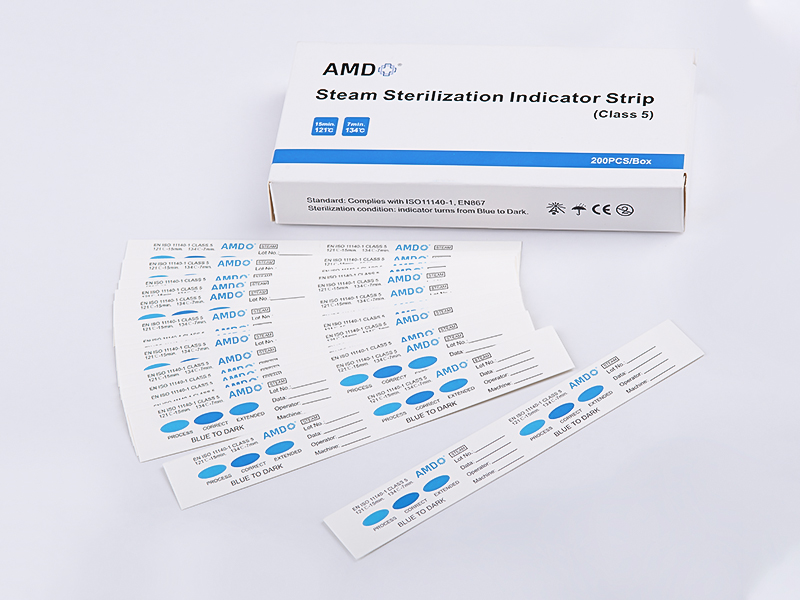
A chemical indicator is a specially designed marking or material that reacts when it encounters conditions associated with a particular sterilization process. In a self seal pouch, the indicator is commonly incorporated into the packaging. It can appear as a printed strip, symbol, or other visible marking.
The indicator contains materials that respond to exposure. When the required conditions are encountered, the indicator changes in appearance. This may involve a change in color or another visible response. The result gives the user a simple visual reference.
This is particularly useful in a busy medical processing area. Staff may handle many packages during a working period. Looking at an indicator can help distinguish packages that have passed through a sterilization process from those that have not.
However, the indicator has a specific role. It is a process monitor rather than a direct test of sterility. The CDC notes that a chemical indicator's expected response does not by itself prove that the item inside the package is sterile.
That distinction matters. A package can show an appropriate indicator response while other problems still need to be considered. Proper cleaning, packaging, loading, sterilizer operation, and monitoring all remain part of the overall process.
How Does the Color Change Happen?
The basic idea is quite simple. The chemical indicator contains a responsive material. During sterilization, the material is exposed to the conditions for which it was designed. That exposure causes a controlled change in the indicator.
For steam sterilization, for example, the indicator may respond to the presence of heat, moisture, or a combination of conditions. Other sterilization methods use different indicators designed for their particular process. The indicator therefore needs to be compatible with the sterilization method being used.
The visible change is useful because it converts an otherwise difficult-to-see process into something that can be checked visually. Staff do not need to determine what happened inside the pouch by opening it. The indicator provides a quick external or internal signal.
The chemistry behind the change does not need to be complicated from the user's perspective. What matters is that the indicator is designed to respond predictably when exposed to the intended process.
The CDC describes chemical indicators as materials that can change color when exposed to conditions associated with sterilization.
The change should also be interpreted according to the instructions supplied for the particular packaging and sterilization process. Different indicators may have different response patterns. A color seen on one type of pouch should not automatically be treated as equivalent to the color seen on another.
Why Are Chemical Indicators Added to Self Seal Pouches?
A self seal pouch already provides a way to contain an instrument before and after sterilization. Adding an indicator gives the package another useful function.
One important purpose is visual identification. After processing, staff can inspect the pouch without opening it. This can help separate processed packages from unprocessed ones and reduce confusion during routine handling.
The indicator can also provide an early warning when something may not have gone as expected. If the expected response does not appear, the package should not simply be assumed to have been processed correctly. The situation needs to be checked before the instrument is used.
Chemical indicators can be especially useful because their response is available after the sterilization process rather than requiring a lengthy waiting period for a separate test. This makes them practical for routine workflow.
There is also a packaging benefit. When an indicator is visible on the pouch, the packaging itself becomes part of the monitoring process. Staff can associate the instrument, pouch, and processing status more easily.
The CDC recommends using chemical monitoring together with mechanical and biological monitoring as part of a broader sterilization program.
| Indicator Function | What It Helps Users Understand |
|---|---|
| Visible Color Response | Whether the package has been exposed to the intended sterilization process |
| External Marking | Helps identify processed and unprocessed packages |
| Internal Indicator | Helps show whether the sterilizing agent reached the inside of the package |
| Unexpected Response | Signals that the package should be investigated before use |
| Process Record Support | Adds another source of information to routine sterilization monitoring |
What Is the Difference Between External and Internal Indicators?
The location of an indicator changes what information it can provide.
An external indicator is placed on the outside of the package. It can be checked without opening the pouch. Its main role is to show that the package has been exposed to the sterilization process.
An internal indicator is placed inside the package. It provides information about whether the sterilizing agent reached the contents. This distinction is important because the outside of a package may experience different conditions from the inside.
A self seal pouch may therefore include an indicator on the packaging surface while an additional indicator is placed with the instrument. The two positions provide different types of information.
The CDC recommends chemical monitoring inside packages and explains that an external indicator can also be useful when the internal indicator cannot be seen from outside.
This approach makes the indicator more than a simple colored mark. Its location becomes part of its purpose.
For medical staff, the practical lesson is straightforward: an external color change should not be treated as proof that the sterilizing agent reached every part of the package. Internal monitoring provides another layer of information.
How Does a Chemical Indicator Show a Possible Problem?
The useful part of an indicator may be what happens when the expected response does not occur.
If the marking does not change as expected, several possibilities may need to be considered. The package may not have been exposed to the intended sterilization conditions. There could also be an issue with packaging, loading, equipment operation, or the indicator itself.
This is why an unexpected indicator result should not simply be ignored.
A package showing an inadequate chemical indicator response should not be used until the situation has been assessed. CDC guidance states that processed items should not be used when mechanical or chemical indicators suggest inadequate processing.
This creates a useful checkpoint in the workflow. Instead of discovering a potential problem after the pouch has been opened, staff can identify the issue while the package remains closed.
The indicator does not necessarily explain why a problem occurred. It provides a signal that further checking may be needed.
That difference is important for everyday operations. The indicator answers a limited question: did the indicator experience the conditions it was designed to detect? It does not answer every question about the sterilization process.
Can a Color Change Prove That an Instrument Is Sterile?
No. This is one of the important points when using self seal pouches with chemical indicators.
A chemical indicator responds to sterilization-related conditions. It does not directly count or detect microorganisms inside the package. An appropriate color response therefore should not be interpreted as an independent guarantee of sterility.
The CDC specifically states that chemical indicators do not prove sterilization has been achieved. Biological indicators serve a different role because they use resistant microorganisms to provide a more direct assessment of the sterilization process.
This distinction does not make chemical indicators unimportant. It defines their proper place in the workflow.
Think of the different monitoring methods as answering different questions. Mechanical monitoring provides information about the operation of the sterilizer. Chemical monitoring shows whether the indicator experienced the intended process conditions. Biological monitoring provides a different type of evidence related to microbial destruction.
Using these methods together gives healthcare workers a broader view of the process than relying on one indicator alone.
For self seal pouches, the chemical indicator is therefore better viewed as one part of a larger system rather than a standalone sterility test.
How Should Staff Read Chemical Indicators on Self Seal Pouches?
Reading an indicator should be simple, but it still requires attention.
Staff should know what the indicator is designed to look like before and after processing. The expected response should come from the pouch manufacturer's instructions and the sterilization method being used.
An unfamiliar or unclear color should not be interpreted casually. Lighting, printing, storage conditions, or visual differences between products can make informal comparisons unreliable.
A basic checking process can help:
Identify the indicator. Confirm that the pouch contains the appropriate indicator for the intended sterilization process.
Check the expected response. Use the instructions associated with the specific pouch rather than relying on memory.
Inspect the package. Look at the indicator along with the overall condition of the pouch.
Check for an unexpected result. If the indicator has not responded as expected, do not treat the package as ready for use.
Follow the facility's procedure. An unexpected result should be handled according to established sterilization and infection-control practices.
The pouch itself also deserves attention. A chemical indicator cannot compensate for a damaged package. Packaging needs to remain an effective barrier after processing. CDC guidance emphasizes that sterilization packaging should allow the sterilizing agent to penetrate while protecting the processed item from contamination during handling.
What Should Facilities Consider When Using Self Seal Pouches With Chemical Indicators?
The usefulness of an indicator depends partly on how the entire packaging process is managed.
The pouch should be suitable for the sterilization method. The instrument should be cleaned and prepared according to the facility's established procedure. The pouch should be sealed correctly, and staff should be able to inspect the indicator clearly.
Storage also matters. A processed pouch needs to remain intact until the instrument is needed. A chemical indicator can show information about the sterilization process, but it cannot repair a torn, punctured, wet, or otherwise compromised package.
Training is another practical consideration. Staff should understand what an indicator can tell them and what it cannot tell them. Misinterpreting a color change can create unnecessary risk, while ignoring an unexpected response can allow a processing problem to go unnoticed.
| Area to Check | Why It Matters |
|---|---|
| Pouch Compatibility | Helps ensure the packaging is appropriate for the intended sterilization process |
| Indicator Compatibility | Ensures the indicator is designed for the process being used |
| Seal Condition | Helps protect the contents after processing |
| Indicator Response | Provides information about exposure to the sterilization process |
| Package Condition | Helps identify damage that may affect the sterile barrier |
| Staff Training | Supports consistent interpretation and handling |
| Monitoring Records | Helps place indicator results within the wider sterilization process |
Self seal pouches bring packaging and process monitoring together in a convenient format. Their chemical indicators make sterilization status easier to recognize without opening the package. At the same time, the indicator has a defined purpose and should not be treated as a standalone proof of sterility.
For facilities using these pouches, the value comes from using the visual response alongside proper packaging, sterilizer monitoring, biological monitoring where required, and established infection-control procedures.







 ‘s-Gravenweg 542, 3065SG RotterdamThe Netherlands
 +31 (0)10 254 28 08